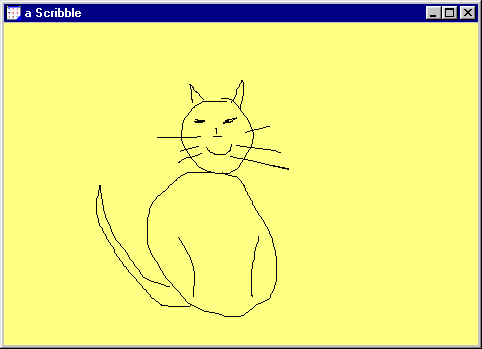
Here's a simple Scribble pad that can act as a tutorial for creating any new MVP component triad.
We won't go through the creation process step by step but what we'll do is to talk through the design issues whilst you simultaneously look at the pre-written code. So, if it is not already present in you image, load in Scribble.pac from Samples\Scribble using the Package Browser and let's go.
In creating a MVP component triad I always create the model first. Programmers using "visual" tools very often draw the user interface part first but this can lead to topsy turvy designs in my experience. First of all, lets see the Scribble pad in action. Evaluate:
Scribble show

The basic data object for Scribble is an InkStroke. Find this class in the Class Browser. Instances of InkStroke represent the points that the mouse has tracked over for a single stroke (down to up). The actual model for a completed scribble will obviously be a collection of these InkStroke objects. I've chosen the Scribble model to be a ListModel holding a collection of InkStrokes. I could have chosen to create a new class (say ScribbleModel) to represent this but, in this simple example, it would have had no methods and would just over complicate the design. You can always create such a new class later if you require.
Tip: You might do this if you wanted to add specific methods to ScribbleModel such as #compress (to compress the ink data for example).
Anyway let's have a quick test of our InkStroke and the model used to hold it.
stroke := InkStroke new.
stroke addPoint: 50@50; addPoint: 100@100; addPoint: 80@20.
model := ListModel with: OrderedCollection new.
model add: stroke.
model do: [:each | each drawOn: View desktop canvas ].
This should scribble annoyingly over the top left of your desktop.
So we have the M part of our MVP triad. It's a ListModel that must hold (only) a series of InkStrokes. The next stage is to decide on a view that is capable of representing this model data onscreen. Very often one can use an instance of an existing class to show model data. For example, we could choose to use a ListBox or ListView to show our ListModel. This would work but would not give the desired effect, merely a list of textual representations of the InkStrokes. No, I'm afraid we are going to have to create a new View subclass to draw our model successfully.
I have created a ScribbleView class as a subclass of View. Take a look at it now. When designing a view, remember that it is responsible for displaying it's model's data and any changes to it. It is not usually responsible for handling the user input; this is the jurisdiction of the associated presenter. The ScribbleView overrides #onPaintRequired: to draw its model. It also observes (in #model:) a number of events triggered by the model to cause it to be redrawn when the model changes.
Let's test the ScribbleView by creating one, setting it's model and placing it inside a dummy ShellView.
view := ScribbleView new.
view model: model.
shell := ShellView new show.
shell addSubView: view.
Since we now have the MV out of MVP, next is the presenter. It's duty is to intercept user input, interpret it, and map it as changes to the model. Let's create a Scribble presenter class.
We could create this as a subclass of ListPresenter since we know that our model is to be a ListModel too. However, ListPresenter also contains a bunch of code that is to do with selections which is (currently) meaningless for Scribble, so we create it as a direct subclass of Presenter.
The class method #defaultModel instantiates a default ListModel to use when a new instance is created. Notice that Scribble class>>defaultView answers the name of a view resource that will be the default view. We must install an instance of ScribbleView into the Resource Manager with this name ("Scribble View"). You can easily do this by executing:
Scribble addView: ScribbleView asResource: 'Scribble view'.
You can then edit this resource in the View Composer by finding it in the Resource Browser and double clicking. You might want to do this to set default background colors or other such stuff.
Now you can instantiate a Scribble component in a default shell by evaluating:
scribble := Scribble new.
Scribble away and write your name or something.
You can access the ink data using #model and save it away for later.
inkData := Scribble model.
Now close the original window. You could, of course, choose to save the ink using an STB filer some other persistency mechanism (e.g. the Pachyderm Object Database). Now try puttng the ink back into another Scribble presenter.
scribble := Scribble showOn: inkData.
You'll see the ink re-appear and can add further to it. For some extra magic, without closing this new window, open another on the same model data.
Scribble showOn: inkData.
Now when you draw in either component the other updates at the end of each stroke.
This completes the tutorial discussion of the Scribble Pad MVP component.
Click here to move on to the next tutorial.